Pageviews from the past week

Saturday 11 June 2011

Its Getting Very Close

Only a few days left and our final assessments will be happening, and of course the college show. The technicians have been working very hard along with some students clearing the ceramics studio of all its accoutrements. Wooden frames have been assembled around the walls and much painting of large panels has been happening. All in white of course. It looks really good so far, its very exciting. 


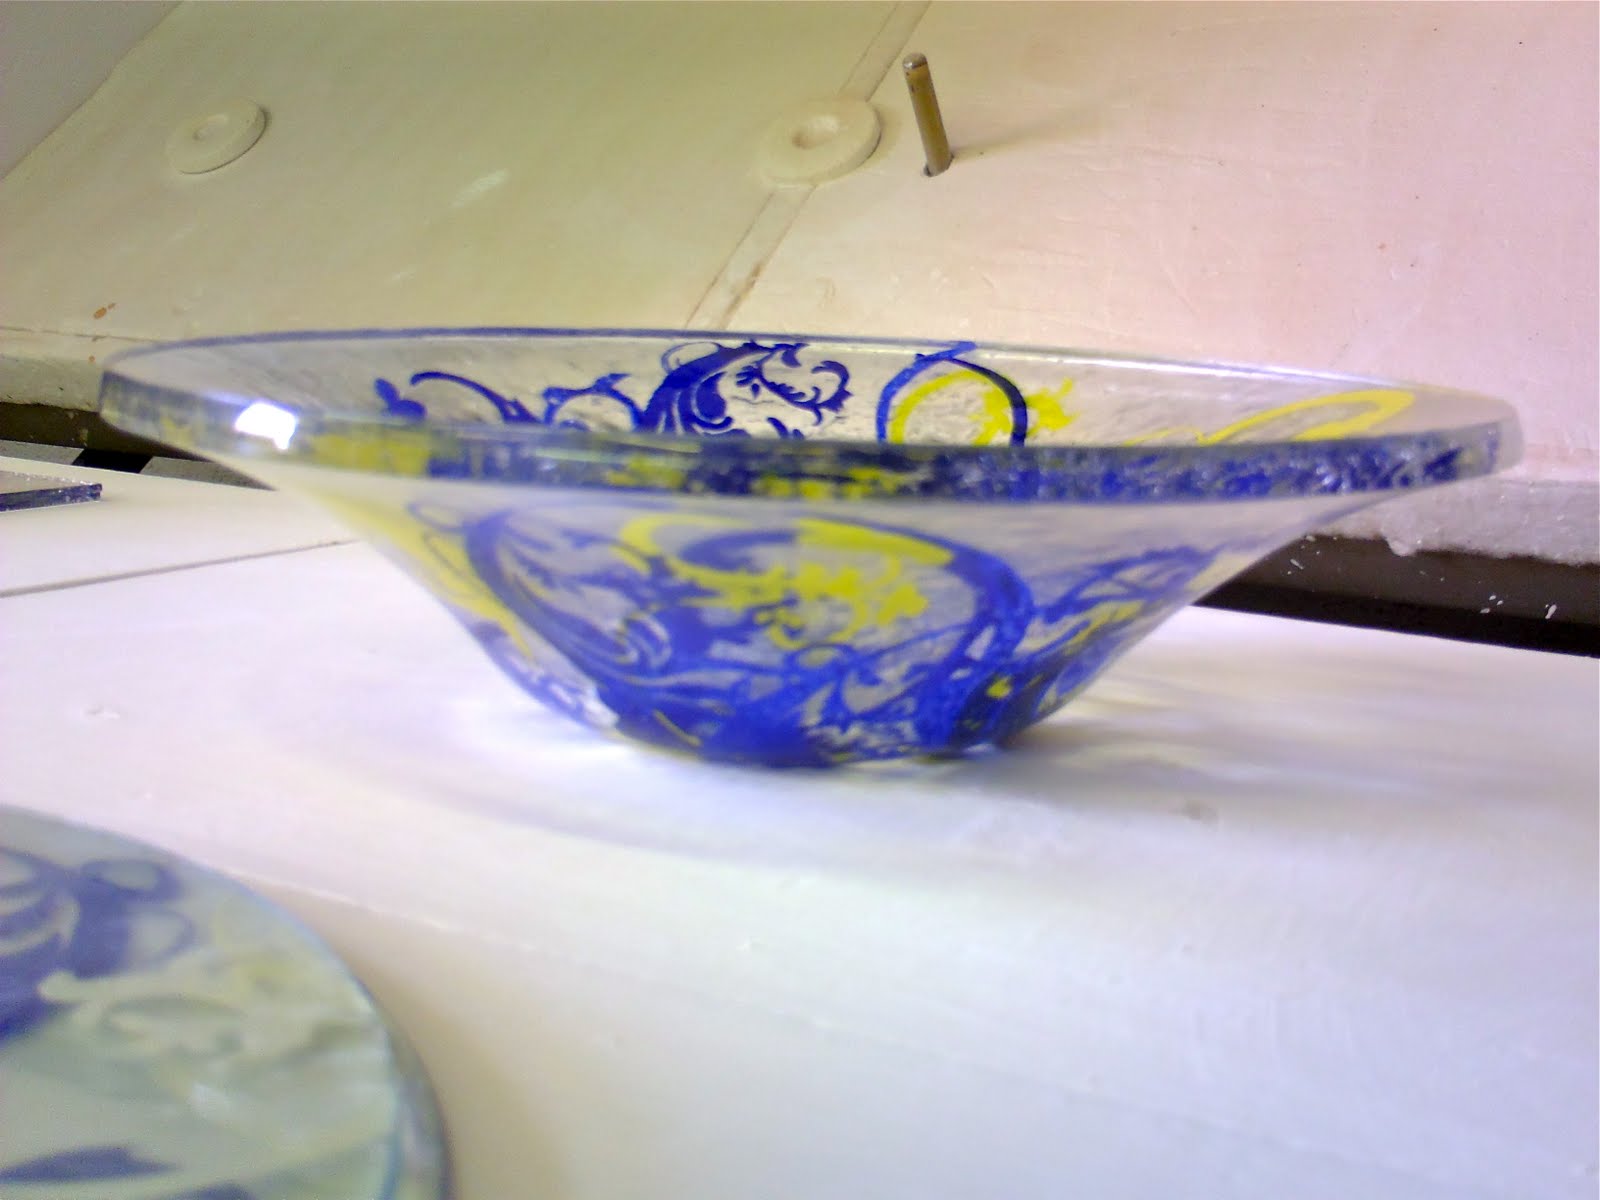
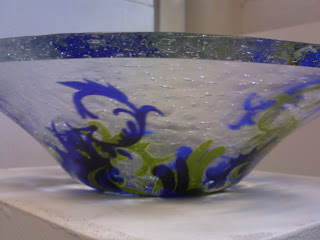
My glass bowls are all finished, several hours spent linishing (this is a belt grinder which uses water for cooling and to aid the process, its my favourite cold working kit) and the edges are beautifully shiny. I am hoping to get some really good photographs of them, but in the meantime here are some not so good...


These bowls are a culmination of several months work and hopefully will have been worth the blood, sweat and tears, literally!


I will publish some more photos of the show and my final presentation soon, watch this space.

Thursday 9 June 2011

Late Night Musings

I have been taking up carpentry this evening. I needed to make a frame of sorts to fix two glass sheets into. One has a ceramic decal fused to it, the other is a water jet cut design. Both designs were drawn in Adobe Illustrator, both were emailed to the appropriate company, to be made. 


The ceramic decal was printed by a company in Stoke on Trent called Tadema Designs. They are very good to deal with and the end result of my image is excellent. Traditionally used for putting images onto ceramics, the technology has developed so that they now fuse on to glass sucessfully.


The water jet design was completed by a company in Estover, Plymouth called unsurprisingly WaterJet Co. Initially the glass fractured when they tried to cut it, so I modified the design. The end result was great, would love to do more of both processes. 


This is the Water Jet cutting machine and below is my design cut into the glass


Next is the ceramic decal after fusing, awaiting removal from the kiln


So I had to come up with a simple way of combining the glass images, one in front of the other and wall mounted. I wanted to use stainless steel cables and clamps, but it was a very expensive method. I consulted a few of our talented technicians, and got a few ideas. In the end I designed it myself, and will post pictures as soon as I can. Here's hoping it all works well.

Tuesday 7 June 2011

Disasters and other things...

KEEP CALM AND CARRY ON 

Well we all try, but sometimes its just not funny. 


After making sure I used the same kiln for another slump, after all the processes that had gone before (silk screening the enamel onto each layer of glass, fusing that, then fusing 3 layers together etc) it all went HORRIBLY WRONG. I had written down the temperature and soak time that worked previously, but for some reason, unknown to me, it was too hot or held too long and was a bit of a disaster. There must have been a gremlin in the kiln.


It was very upsetting, as it was my favourite colour combination, it worked well before disaster truck! Of course several of my fellow students thought it looked good like that, but underneath the glass had folded under itself and left very sharp edges. I don't think it can be rectified, but it could be cut up and made into other things. 


Anyway in true Blue Peter fashion, here's one I made earlier...


I have another in the same kiln, although the temperature was adjusted 
-50C from the disaster temperature (which was 665C held for 35mins) but it was on a long anneal so I won't be able to see it until tomorrow, sleeping tonight will be a problem I think, especially as everything is crossed.


This particular fusing kiln apparently overheats 50C anyway so possibly that was the problem, I was not responsible for programming it! 


Only one week until final assessments and the Summer Show, PHEW...